

Last Easter, I made a rookie mistake. I bought a ton of those foam Easter egg kits from the dollar store, sat my kids down at the kitchen table, and announced it was “craft time.” Within about seven minutes, my five-year-old had glitter in her eye, my eight-year-old declared the whole thing “boring,” and I was scrubbing foam stickers off the wall.
Lesson learned.
This year, I actually planned. I tried a bunch of different Easter egg crafts some were hits, some were total flops and I’m sharing everything I figured out so you don’t have to go through the same mess.
Whether you’ve got toddlers, school-age kids, or that tween who acts like everything is embarrassing, there’s something here for every family.
Why Easter Egg Crafts Are Actually Worth the Effort
I know, I know crafts feel like a lot of setup and cleanup for 20 minutes of fun. But hear me out.
Easter egg crafts do something that screen time just can’t. They give kids a finished product they’re proud of. My daughter still talks about the egg she decorated last year that “looks like a princess.” That egg is sitting in a little basket on her shelf right now. No tablet moment has ever made it to a shelf.
Plus, they’re genuinely good for fine motor skills, creativity, and patience. If you’ve got a toddler working on grip strength or a kid who needs something calming after school, this kind of hands-on activity checks a lot of boxes.
And honestly? They’re a great excuse to sit together and just talk. Some of my best conversations with my kids happen when our hands are busy.
What You’ll Need (No Special Store Trips Required)
Before diving into specific crafts, here’s the good news: most of what you need is already at home.
Basic supplies that cover almost every project:
- Hard-boiled eggs or plastic fillable eggs
- White vinegar and food coloring (classic dye method)
- Mod Podge or white school glue
- Tissue paper scraps
- Acrylic craft paint and foam brushes
- Rubber bands or washi tape (for resist dyeing)
- Markers both regular and Sharpie permanent
- Googly eyes (these make everything better)
- String, yarn, or ribbon
If you want to go the no-mess route for little ones, plastic eggs and sticker sheets are perfectly valid. There’s no craft police.
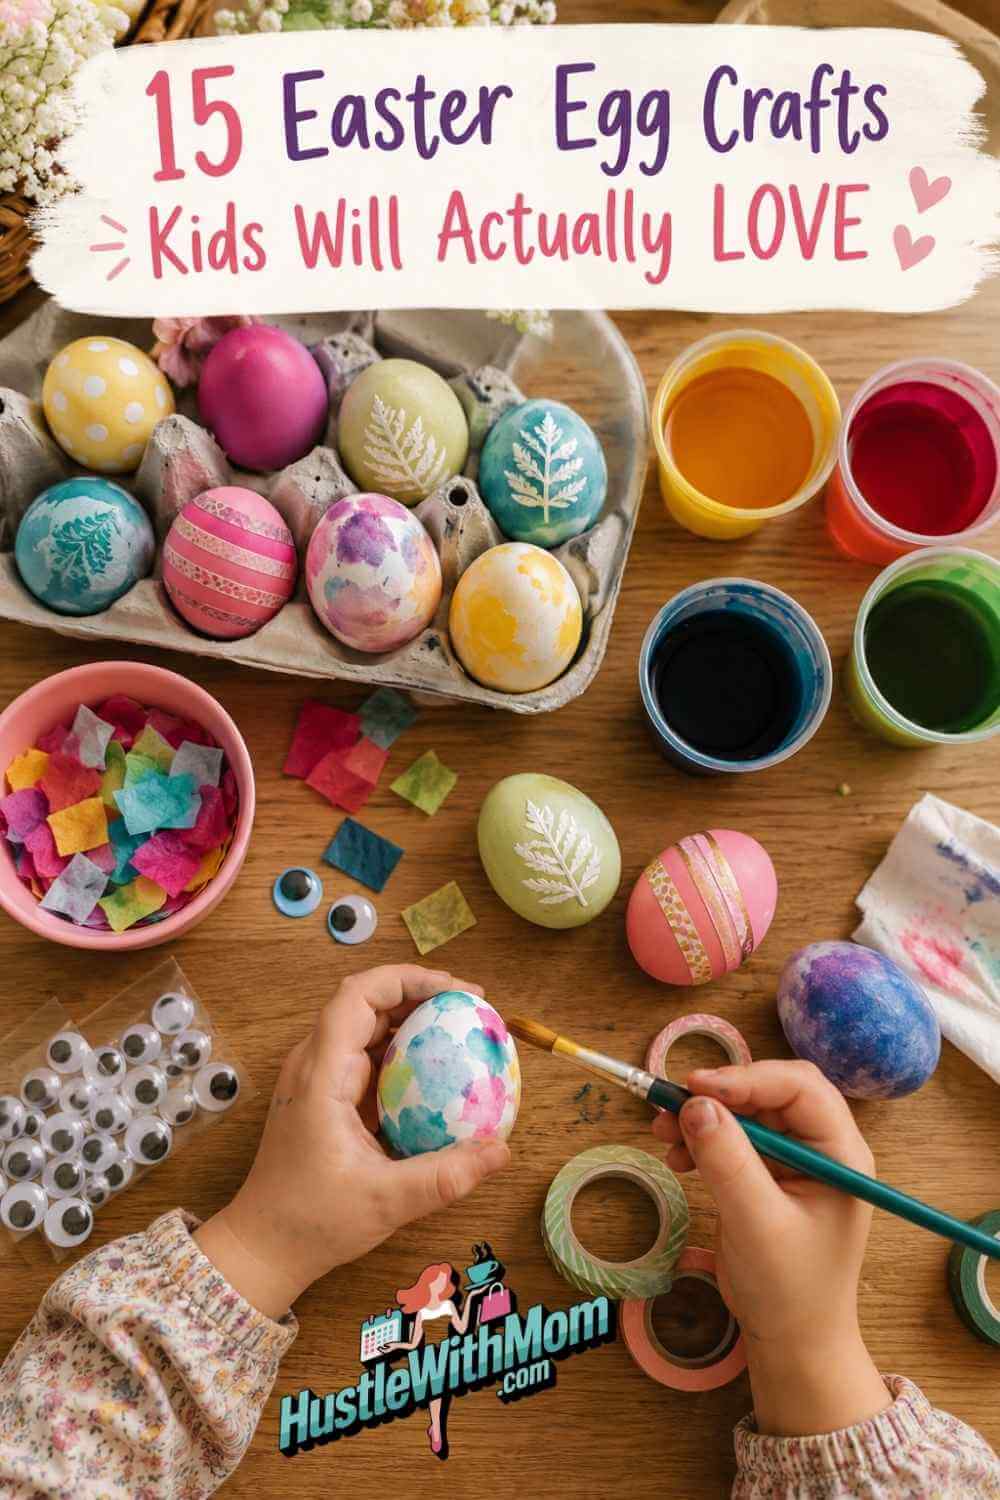
15 Easter Egg Crafts for Kids (Organized by Age and Mess Level)
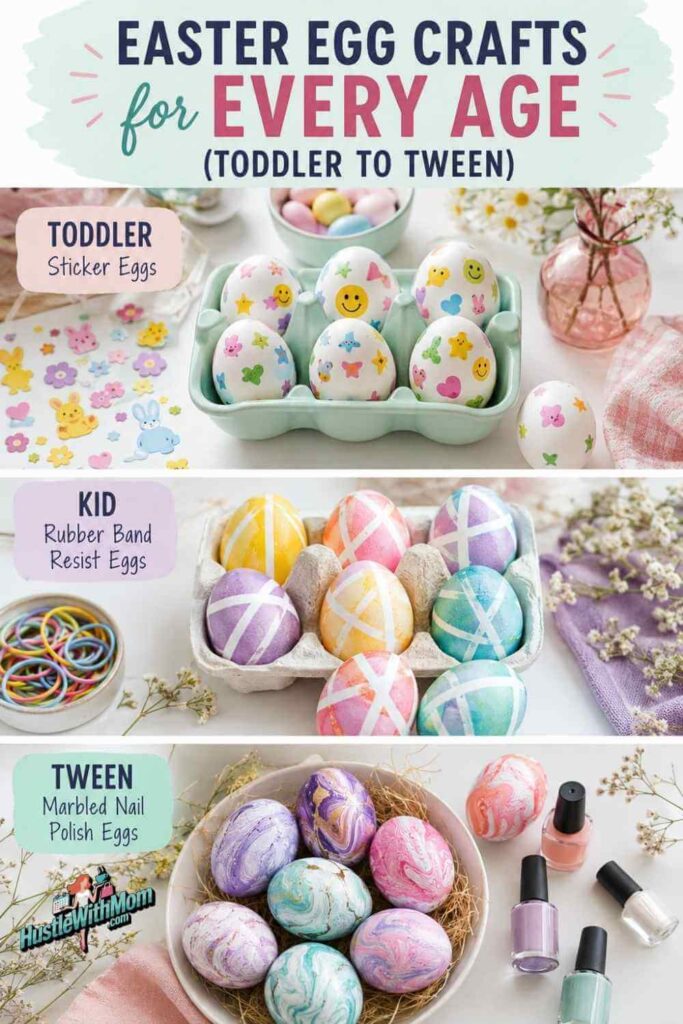
Easy Easter Egg Crafts for Toddlers (Ages 2–4)
1. Dot Sticker Eggs
Give your toddler a hard-boiled egg or a plastic egg and a sheet of colorful dot stickers. Let them go wild placing stickers wherever they want. No instructions needed they’ll figure it out, and the result is genuinely cute. Zero mess, huge pride.
2. Foam Stamp Painted Eggs
Cut a potato in half and carve a simple star or heart shape (you do this part, obviously). Pour washable paint onto a paper plate. Let your toddler stamp away. Works great on plastic eggs or even paper egg cutouts if you’re worried about mess.
3. Tissue Paper Decoupage Eggs
Tear tissue paper into small squares. Let kids brush a thin layer of Mod Podge onto a plastic egg, press tissue pieces on, and brush another layer over top. The colors bleed together in a really beautiful way when it dries. This one takes about 10 minutes and looks impressively professional.
Fun Easter Egg Crafts for Kids Ages 5–8
4. Rubber Band Resist Eggs
Wrap rubber bands tightly around hard-boiled eggs in different directions before dipping them in dye. When you remove the bands, you get these cool striped patterns where the dye couldn’t reach. My seven-year-old thought this was basically magic.
5. Sharpie Tie-Dye Eggs
This one surprised me it’s so simple and the results are genuinely stunning. Draw dots or scribbles on a hard-boiled egg with Sharpie markers, then use a dropper to add a few drops of rubbing alcohol. The ink spreads and bleeds into gorgeous swirls. Keep the alcohol away from little hands, but older kids can do this almost entirely on their own.
6. Washi Tape Geometric Eggs
Hand your kid a roll of washi tape (or a few colors) and let them cover a plastic egg however they want. Stripes, chevrons, random patchwork all of it looks great. You can dip washi-covered hard-boiled eggs in dye first and then remove the tape for a cool pattern reveal, too.
7. Melted Crayon Eggs
Warm a hard-boiled egg in a slightly warm (not hot) oven for about 10 minutes, then let kids rub crayon tips directly on the egg. The wax melts instantly and creates gorgeous swirled color. Important safety note: the egg should be warm, not hot test it yourself first.
8. Watercolor Galaxy Eggs
Brush a hard-boiled egg with a little water, then paint with watercolor paints in purples, blues, and blacks. Add tiny white dots with a toothpick for stars. This became my daughter’s favorite because she’s very much going through a space phase right now.
9. Decoupage Map or Book Page Eggs
Tear small pieces from old maps, sheet music, or book pages you’re not using. Decoupage them onto plastic eggs. The result is very Pinterest-worthy and kids love the treasure-hunt feel of finding interesting pieces to add.
Easter Egg Crafts for Tweens and Older Kids
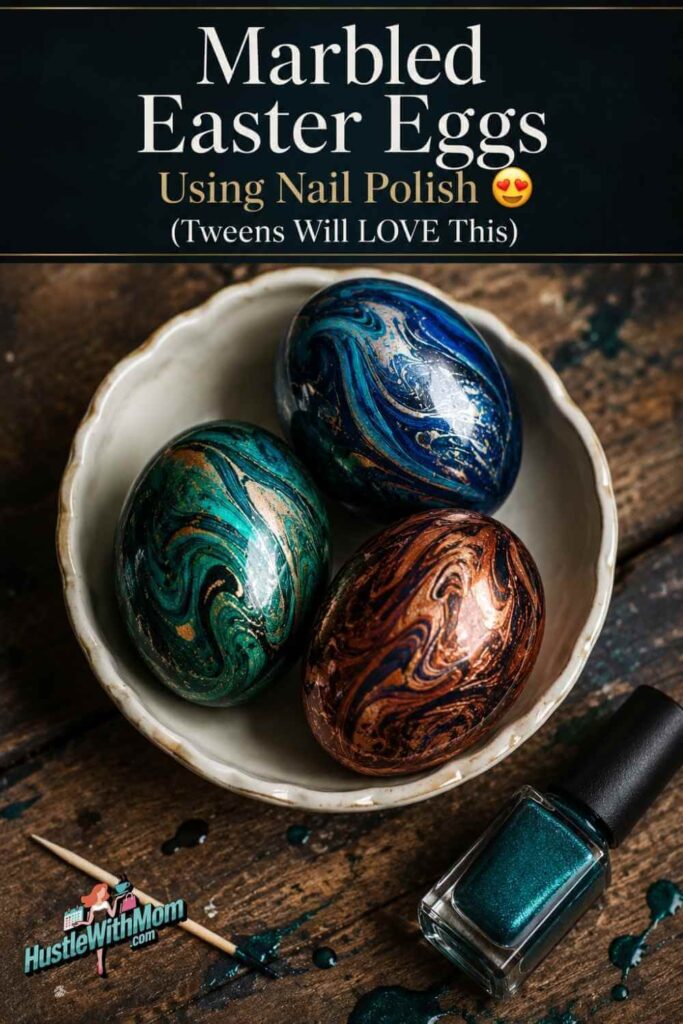
10. Marbled Nail Polish Eggs
Fill a disposable cup with water. Drip a few drops of nail polish onto the surface it’ll spread out. Swirl gently with a toothpick, then roll a hard-boiled egg through the surface. Every single egg turns out differently, and they look genuinely beautiful. Do this outside or with good ventilation.
11. Ombre Dip-Dyed Eggs
Make a cup of dye and dip an egg in gradually a little more of the egg each time you dip. You get a lovely gradient from light to dark. Takes patience, which is actually good for kids who are learning that skill.
12. Embroidery Floss Wrapped Eggs
Use a blown-out egg (poke a small hole in each end and blow out the contents kids find this weirdly satisfying). Glue the end of embroidery floss to the top and wrap tightly in patterns. These look incredibly intricate but the technique is basically just wrapping and gluing.
Nature-Inspired Easter Egg Crafts
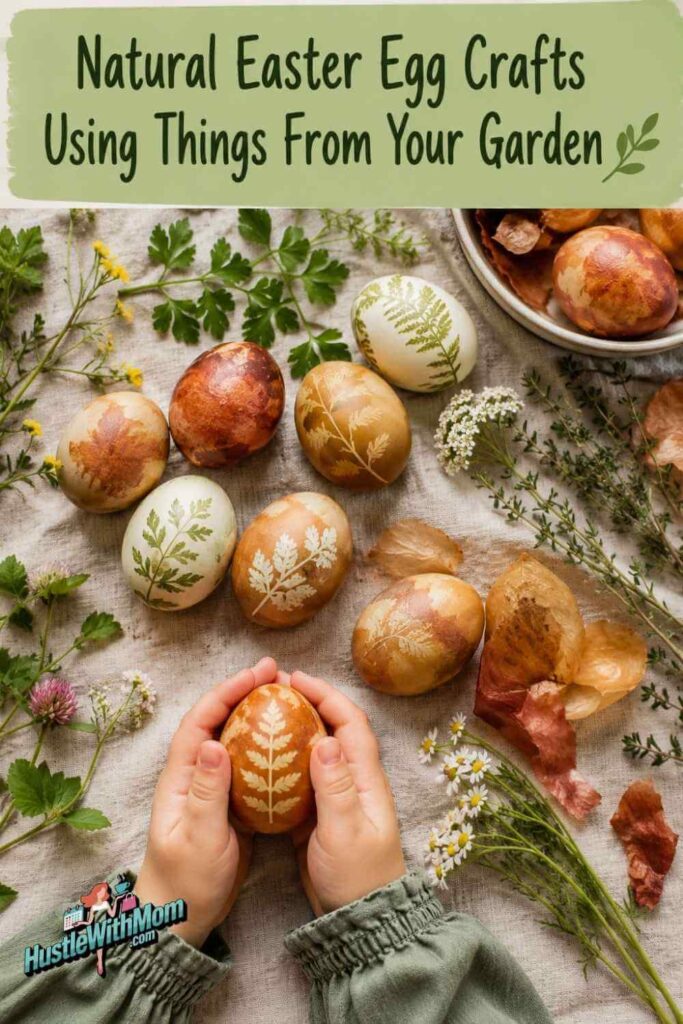
13. Leaf Print Eggs
Press a small leaf or flower flat against a hard-boiled egg and secure it with a piece of nylon stocking (cut from an old pair of tights). Tie it tight, dip in dye, let dry, and carefully remove the nylon. The leaf creates a perfect silhouette. This is my personal favorite every year.
14. Onion Skin Natural Dye Eggs
This is old-school and genuinely magical. Gather dried yellow or red onion skins, wrap them around a hard-boiled egg, secure with nylon, and simmer in water with a splash of vinegar for 20-30 minutes. The eggs come out with these gorgeous mottled earthy tones. Great for kids who are curious about natural dyeing or chemistry.
15. Herb Print Eggs
Same concept as leaf prints but with herbs like parsley, dill, or cilantro from your kitchen. The detailed fronds create incredibly delicate patterns. Completely free if you already cook with fresh herbs.
Setting Up Your Craft Space (What I Learned the Hard Way)
The setup really does make or break the experience. Here’s what actually works:
- Cover everything. A plastic tablecloth or an old shower curtain under the work area saves so much stress.
- Use cups, not bowls, for dye. Cups are less likely to tip and easier for kids to lower eggs into.
- Have a “drying station” ready. An egg carton works perfectly. Label it if you have multiple kids so nobody fights over whose is whose.
- Work in small groups. If you’ve got several kids, break into smaller age groups for better results. A two-year-old and a ten-year-old have very different craft needs.
- Let them make mistakes. An egg that got dipped in the wrong color or got a little smudgy is not a failure it’s their egg. Resist the urge to fix it.
If you’re always looking for ways to make the day run smoother, you might enjoy these mom life hacks that actually save time some of them are genuinely useful for craft days too.
How to Do the Classic Egg Dye Method (So It Actually Works)
A lot of people get frustrated because their dyed eggs come out pale and patchy. Here’s what makes the difference:
- Hard-boil your eggs correctly. Cover eggs with cold water, bring to a boil, turn off the heat, cover, and let sit 12 minutes. Transfer to ice water immediately. This prevents that green ring around the yolk and gives you a firm egg that’s easy to handle.
- Make dye that actually sticks. Mix 1/2 cup hot water + 1 teaspoon white vinegar + 15-20 drops of food coloring per cup. The vinegar is essential it helps the dye bond to the shell.
- Let eggs sit longer than you think. Most instructions say 5 minutes. I say 15-20 if you want really saturated color. Pull them with a slotted spoon, set them on an egg carton, and let them dry completely before handling.
- White eggs dye better than brown. If you usually buy brown eggs, grab a carton of white ones for Easter.
- Add a coat of vegetable oil when dry. Rub a tiny bit on each egg with a paper towel for a beautiful sheen. This is the trick that makes home-dyed eggs look like the ones you see in photos.
Common Mistakes That Ruin the Fun
Rushing the drying time. Wet eggs smear, period. Build in waiting time or have a secondary activity going so kids aren’t hovering over their eggs the moment they come out of the dye.
Too many choices at once. Giving a young child 12 colors and every possible craft supply leads to overwhelm, not creativity. Start with three colors and add more as you go.
Skipping the aprons. Food coloring on clothing does not come out. I learned this the expensive way with a white school shirt.
Trying to do it all in one day. If you want to do dyeing AND decorating with paint or stickers, let the dye dry overnight and decorate the next day. Trying to rush it means smears, and smears mean tears.
Making Easter Crafts Part of a Bigger Tradition
What I’ve noticed over the years is that the craft itself matters less than the ritual around it. My kids remember “the year we did the leaf ones outside” and “the time we listened to that Easter playlist while we worked.”
If you’re building traditions with your kids, you might be in a season of life where simple, connected moments matter most whether you’re parenting solo or just trying to make the most of a busy family schedule. Resources like these solo parenting tips and practical parenting strategies can help you feel more supported in those efforts.
And if you want the kids to stay engaged before and after the egg crafts, having a few activities ready like homemade playdough can keep the creative energy going without more screen time.
FAQ’s:
How do you do Easter egg crafts with toddlers without it becoming a disaster?
Keep it simple and low-stakes. Sticker eggs, dot painting, and tissue paper decoupage all work great for under-3s. Use plastic eggs instead of real ones, and don’t worry about the outcome the process is the point. Set up in a contained space with everything pre-measured.
What’s the safest Easter egg dye for young children?
Food coloring with white vinegar is completely food-safe and non-toxic. If you want store-bought kits, look for ones labeled non-toxic. Natural dyes (like onion skins or turmeric) are even gentler and make for a great science experiment.
Can you decorate Easter eggs without dyeing them?
Absolutely. Markers, stickers, washi tape, paint, and decoupage all work on plain white hard-boiled eggs or plastic eggs without any dyeing involved. This is actually a great option if you want to skip the vinegar smell or dye mess entirely.
How far in advance can you make Easter egg crafts?
Plastic egg crafts can be made weeks in advance. Hard-boiled dyed eggs should be refrigerated and are best used within one to two weeks. If you’re making them purely for decoration (not eating), you can blow out the egg contents and they’ll last indefinitely.
What do you do with Easter eggs after the holiday?
Eat the hard-boiled ones! Make egg salad, deviled eggs, or just snack on them. Plastic decorated eggs can be kept in a box and reused next year my kids love rediscovering them. Blown-out egg crafts can be stored carefully and become part of your Easter decorations year after year.
Are Easter egg crafts appropriate for kids with sensory sensitivities?
Yes, with some adjustments. Sticker crafts are great for kids who don’t like getting their hands messy. Washi tape projects are another clean option. If your child doesn’t like the smell of vinegar dye, try natural dyes or just skip to paint and stickers. There’s no single “right” way to do these crafts.
What’s a good Easter craft for a class or large group of kids?
Dot sticker eggs and washi tape eggs are the best for groups they require no drying time, create no mess, and every child can work at their own pace without waiting. For slightly older groups, the rubber band resist method is always a crowd-pleaser.
Final Thoughts
The best Easter egg craft is the one your kid is excited about. Don’t overthink it. Start with one or two techniques, have your supplies ready, protect your table, and then just let the kids lead.
Some eggs will be gorgeous. Some will look like a muddy mystery. Both are completely fine.
What matters is that you made something together, that your kid walked away proud of their work, and that next Easter they’ll probably ask to do it again. That’s the whole goal.
Happy crafting and may your floors remain dye-free. (Mine definitely won’t be.)